Using the Data Model and data injection using K-Admin
Updating websites have always been a hassle! You edit the source code, stage it and deploy it. But with Kitsune it has become amazingly easy. With Kitsune you can you can design the websites with specific components that can have a dynamic value extracted from your K-Admin.
Let's try a sample demo to help you understand how it works -
Create Model and Language
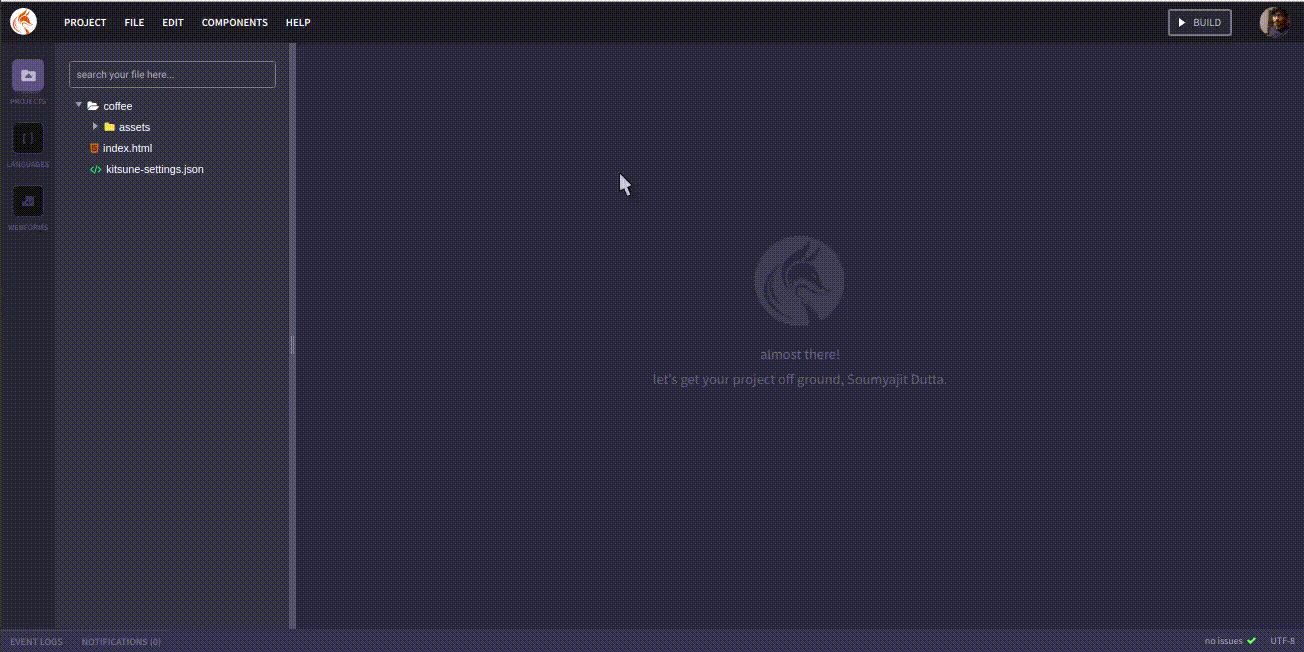
1) Create a new project using Kitsune and let's name it 'hello', you can choose any name you like. And then open the project you created to check it. You should find something similar to the image below to show a simple Html page.
2) Now click on the language button on your left tab. Now we will go to the language tab and create a new language and name it as coffeshop. This is your base class. Now our class can contain objects and data types, remember not to name the object name same as the class name.
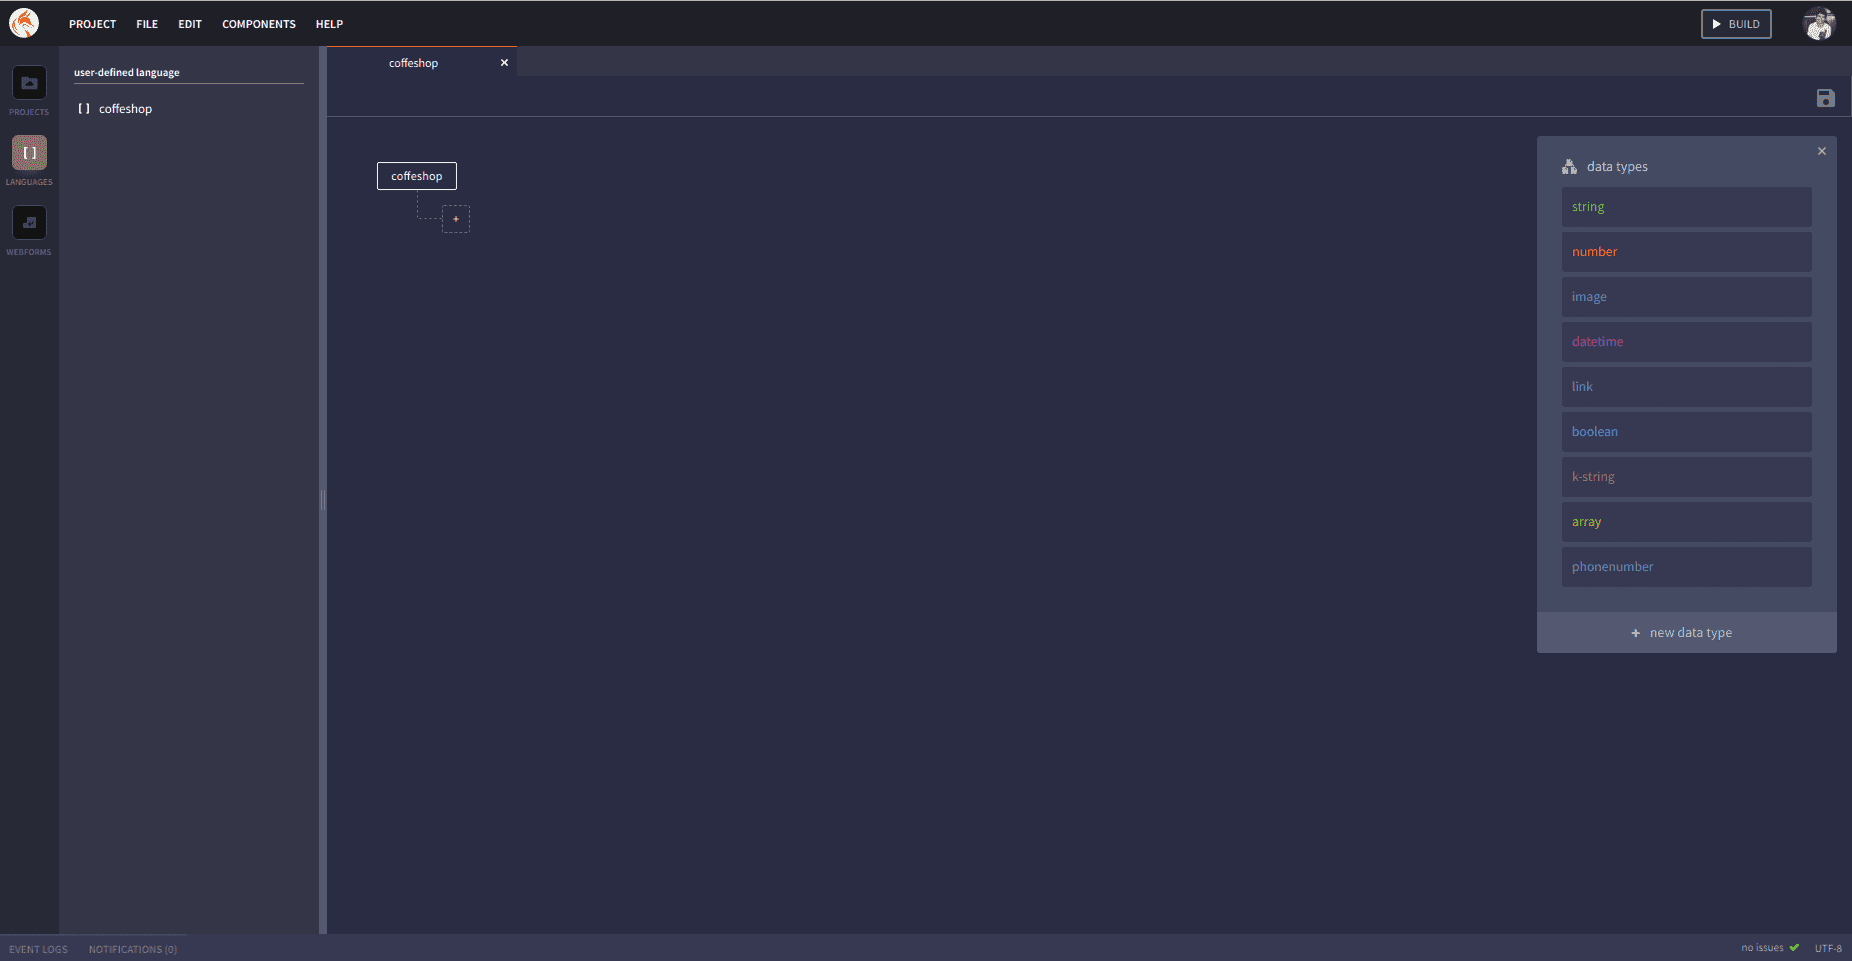
Warning
A Language name is always unique to whole kitsune. Think it as a unique identifier to identify your whole language in kitsune from anywhere. Thus you need to choose a unique name to create the language or else an error will be shown that the language is already present.
3) Cool, now let's create a simple string to this class, calling it name and having the data type string.
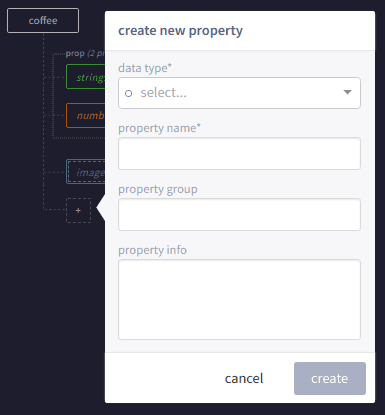
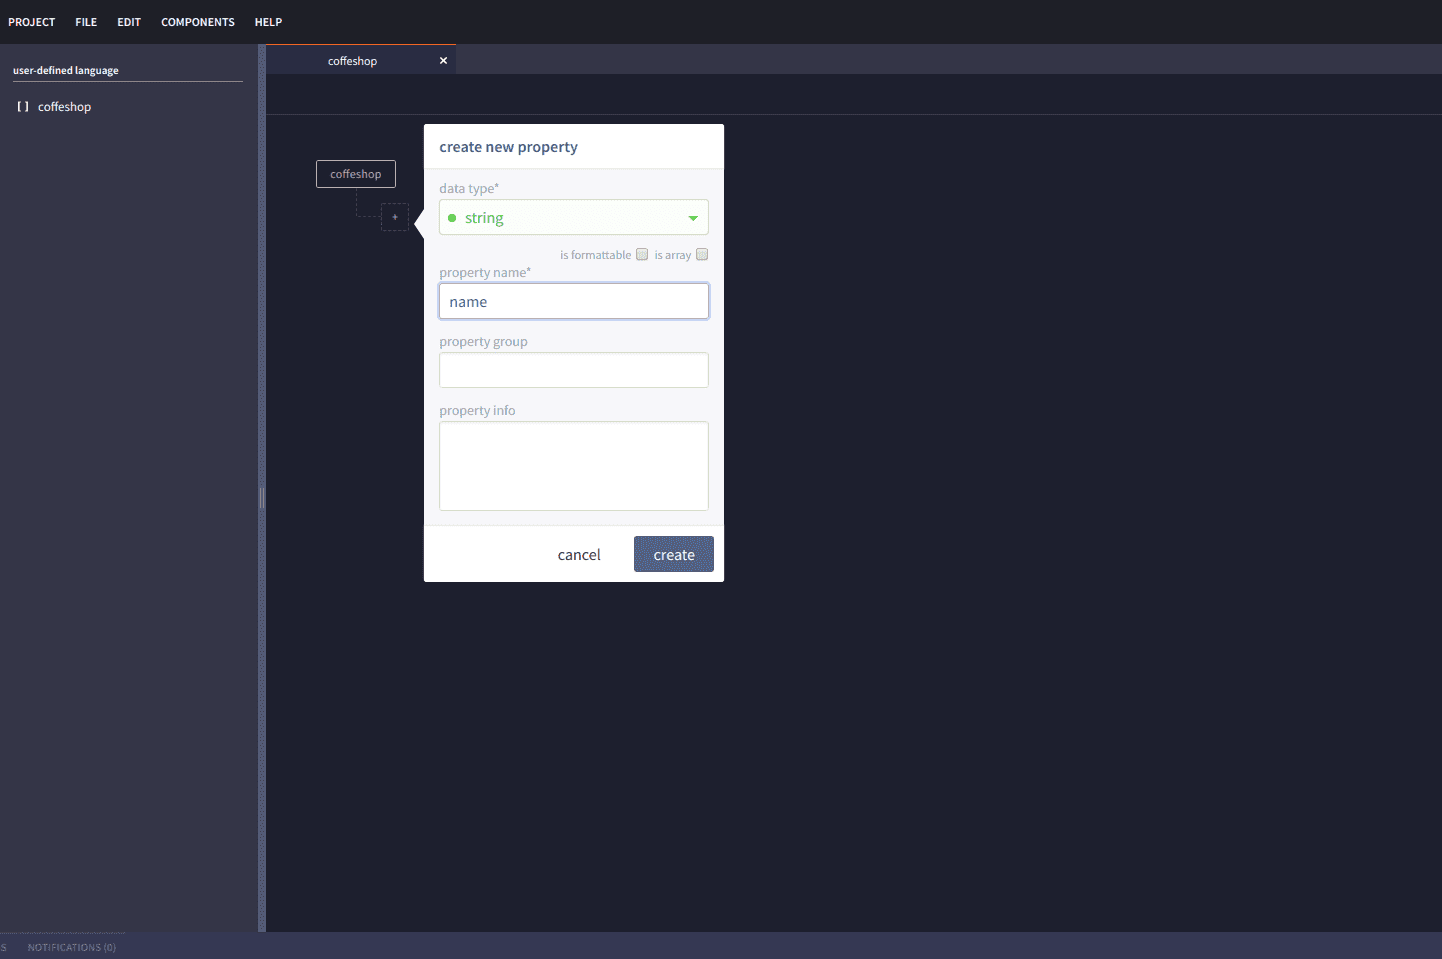
Now complete creating the new language from scratch. Each kitsune language you make is only accessible to you and not shared to anyone else. The data of the language can be changed from the k-admin dashboard whose credentials will be sent to your email while creating the project.
Note
Language name cannot be changed once created and the object names and properties cannot be changed after they are saved. This is done to maintain proper structure integrity of Kitsune generated sites.
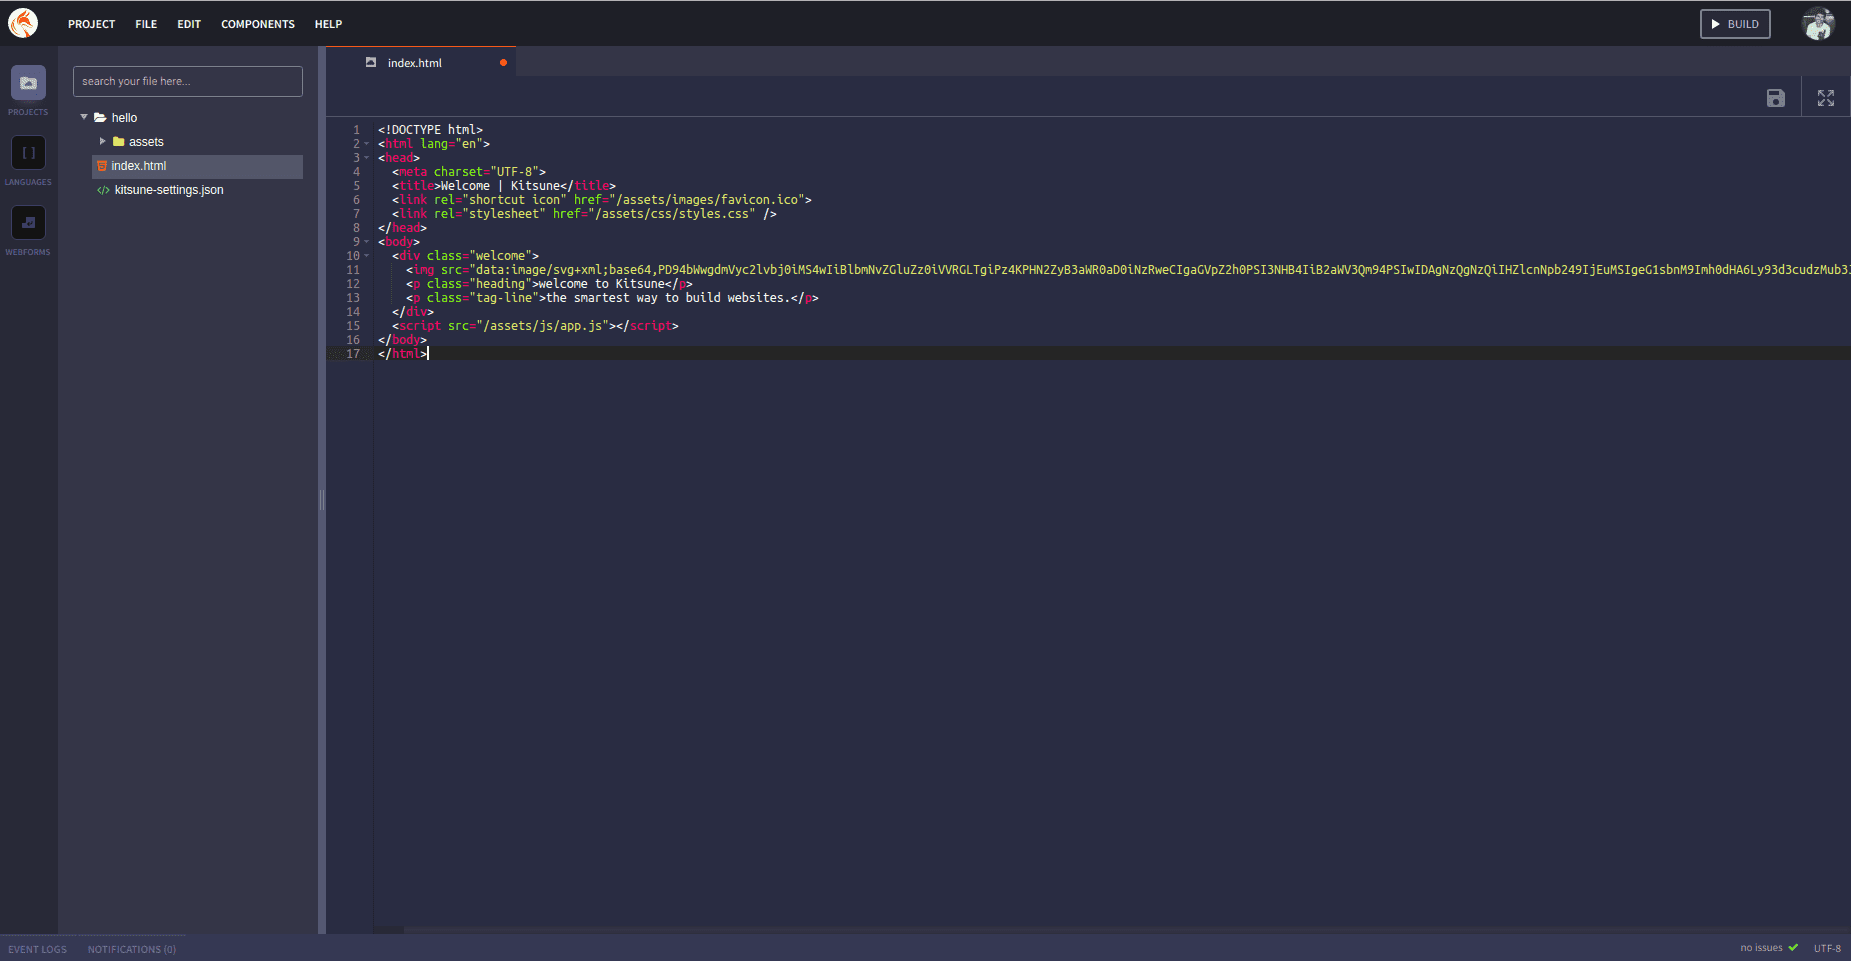
4) Now we want to change our name to be dynamic so we go ahead and change line 12 to -
<p class="heading">welcome to </p> This will treat the value under double brackets as a variable and generate the same accordingly.
K Admin
5) With that done we can save our progress here and move. Now go to your mail, you must have received the K-Admin credentials for your website on it. You can use the URL and credentials to log in to your K-Admin. As you can see, K-Admin has a tab manage your content, once you to go to it you can see that it has a property Name autogenerated from the schema that we made. 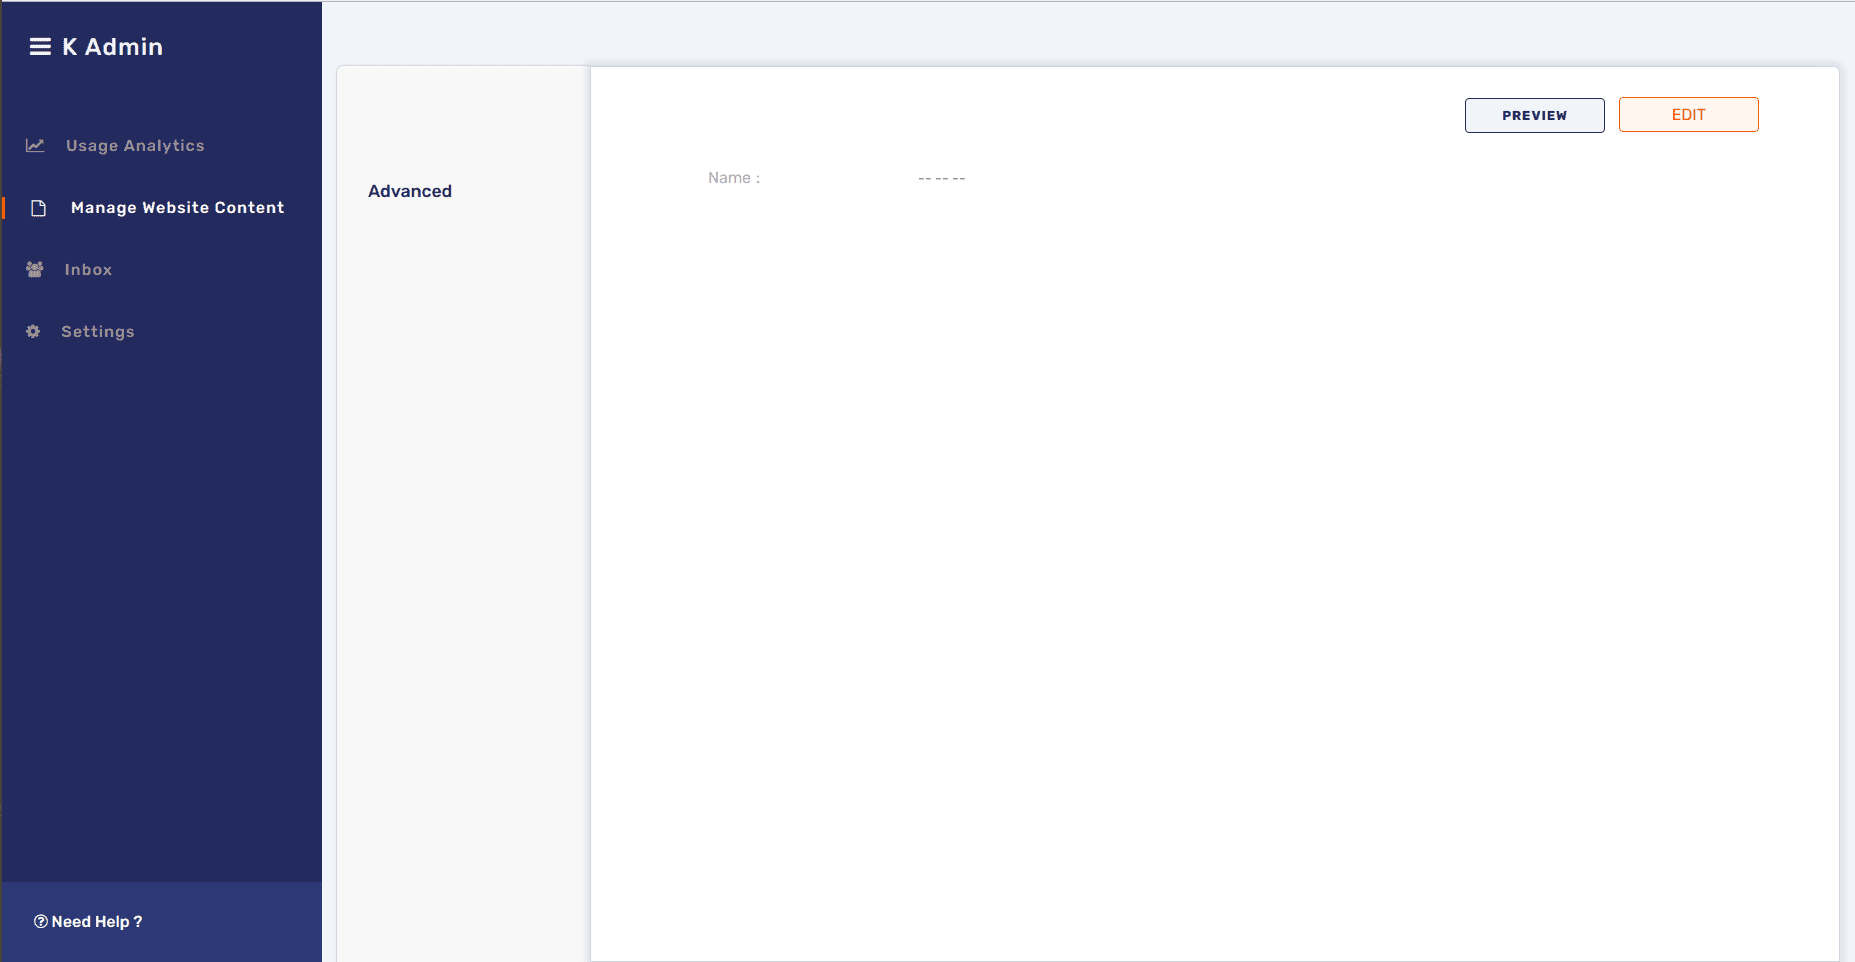
6) Now, let's use the edit button to change it to Geek Cafe. 
7) You can go back to Kitsune dashboard and preview your website. 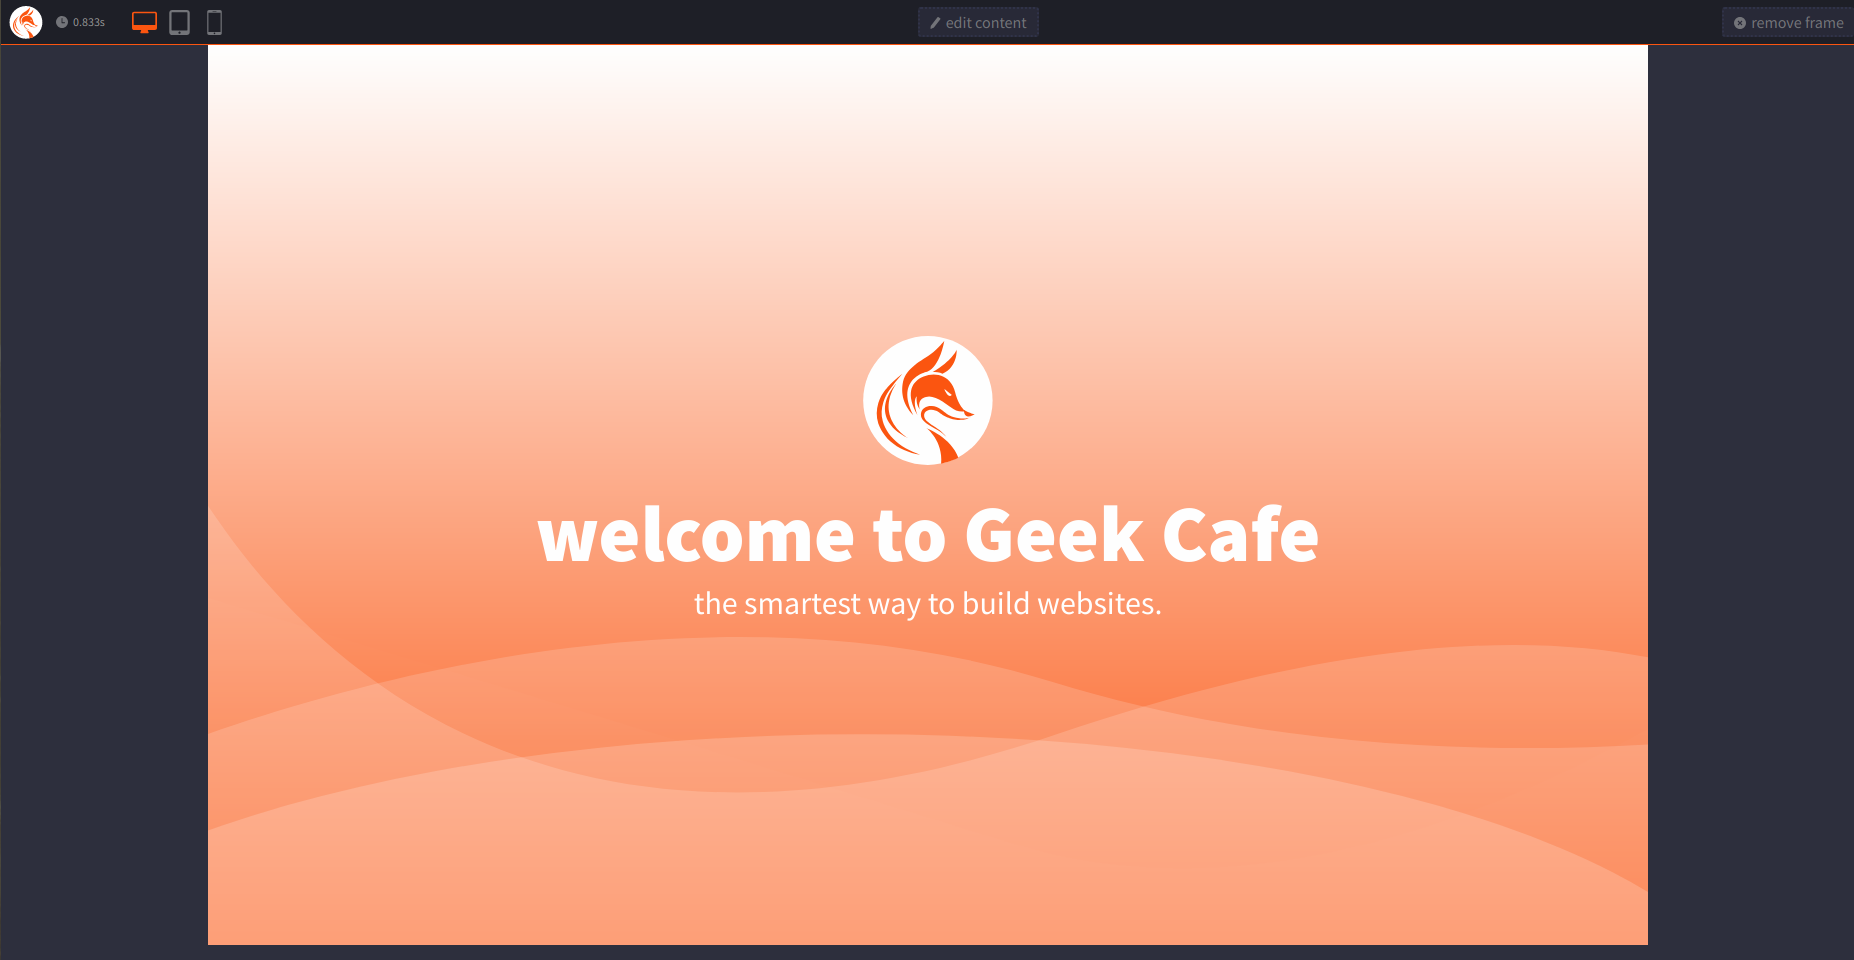
Voila, you have the website data changed to GeekCafe.
Info
You can think of a lot of real-life applications where you could utilize these dynamic variables throughout your website. Let's say you want to change the price of your product, use a variable and so in many other cases.
Intro Videos